Notification Rule Triggered
This trigger is fired in Zapier when an associated Notification Rule in SalesDesk is triggered. To use this trigger, follow these steps.1
Configure Notification Rule in SalesDesk
When a notification rule is set up in SalesDesk, it can be referenced in this trigger to commence a Zap. The Notification Rules can be accessed in the Settings section of SalesDesk.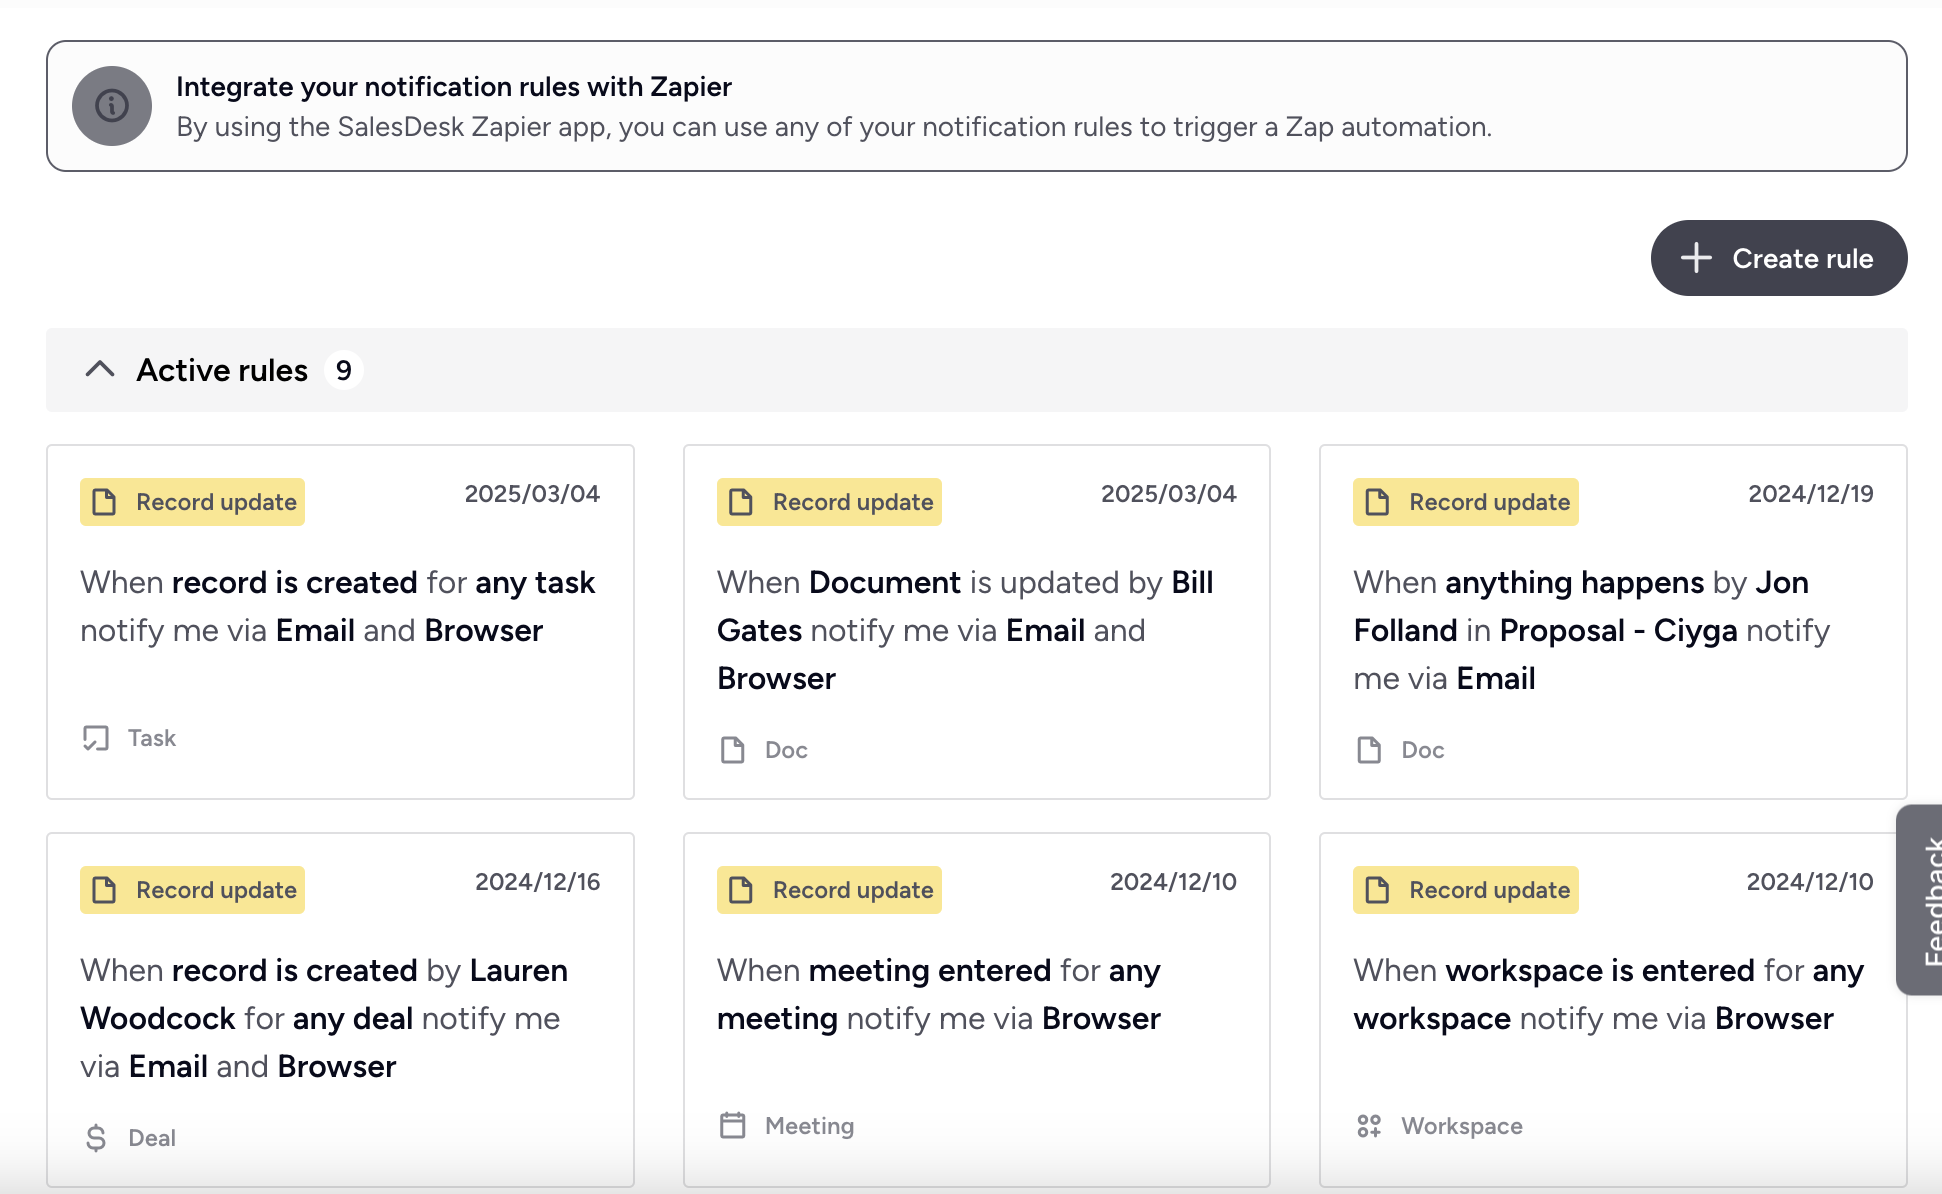
2
Apply SalesDesk Trigger
Create a new Zap and use the SalesDesk App for the first step. Select the Trigger event and choose the SalesDesk account connection you set up before.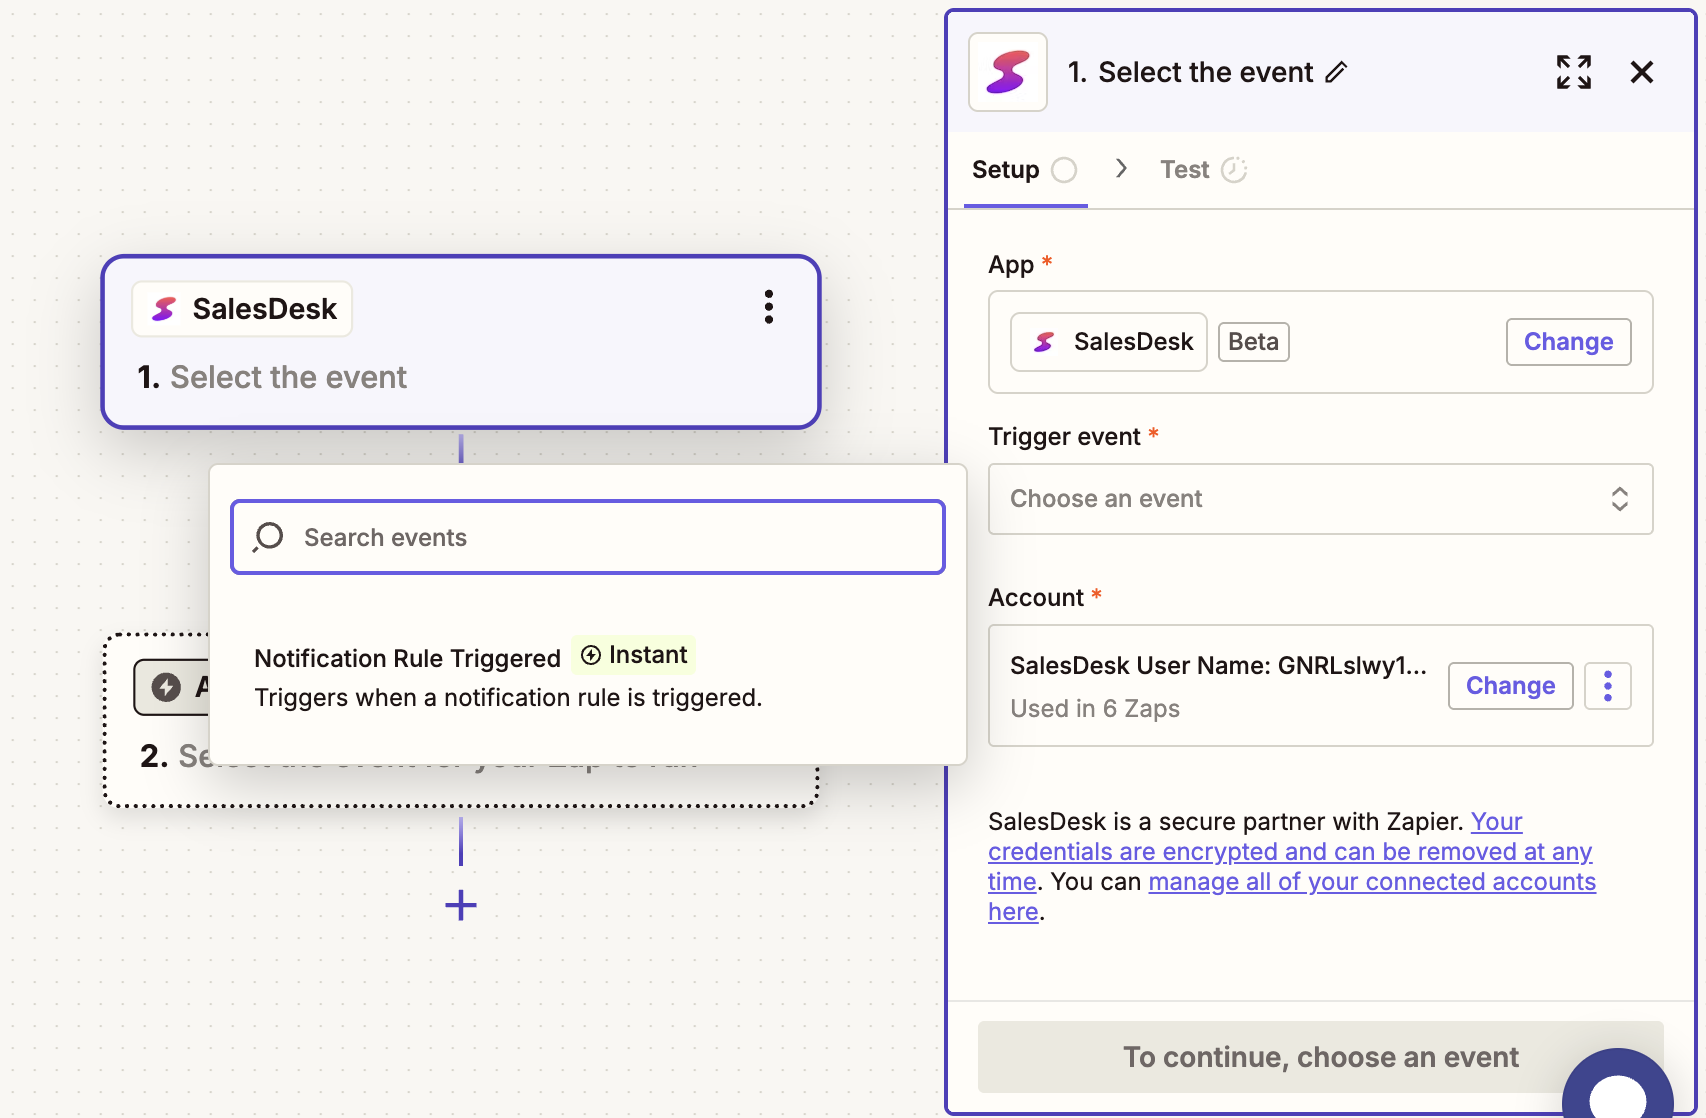
3
Select SalesDesk Notification Rule
Next, select the SalesDesk Notification Rule you set up in SalesDesk.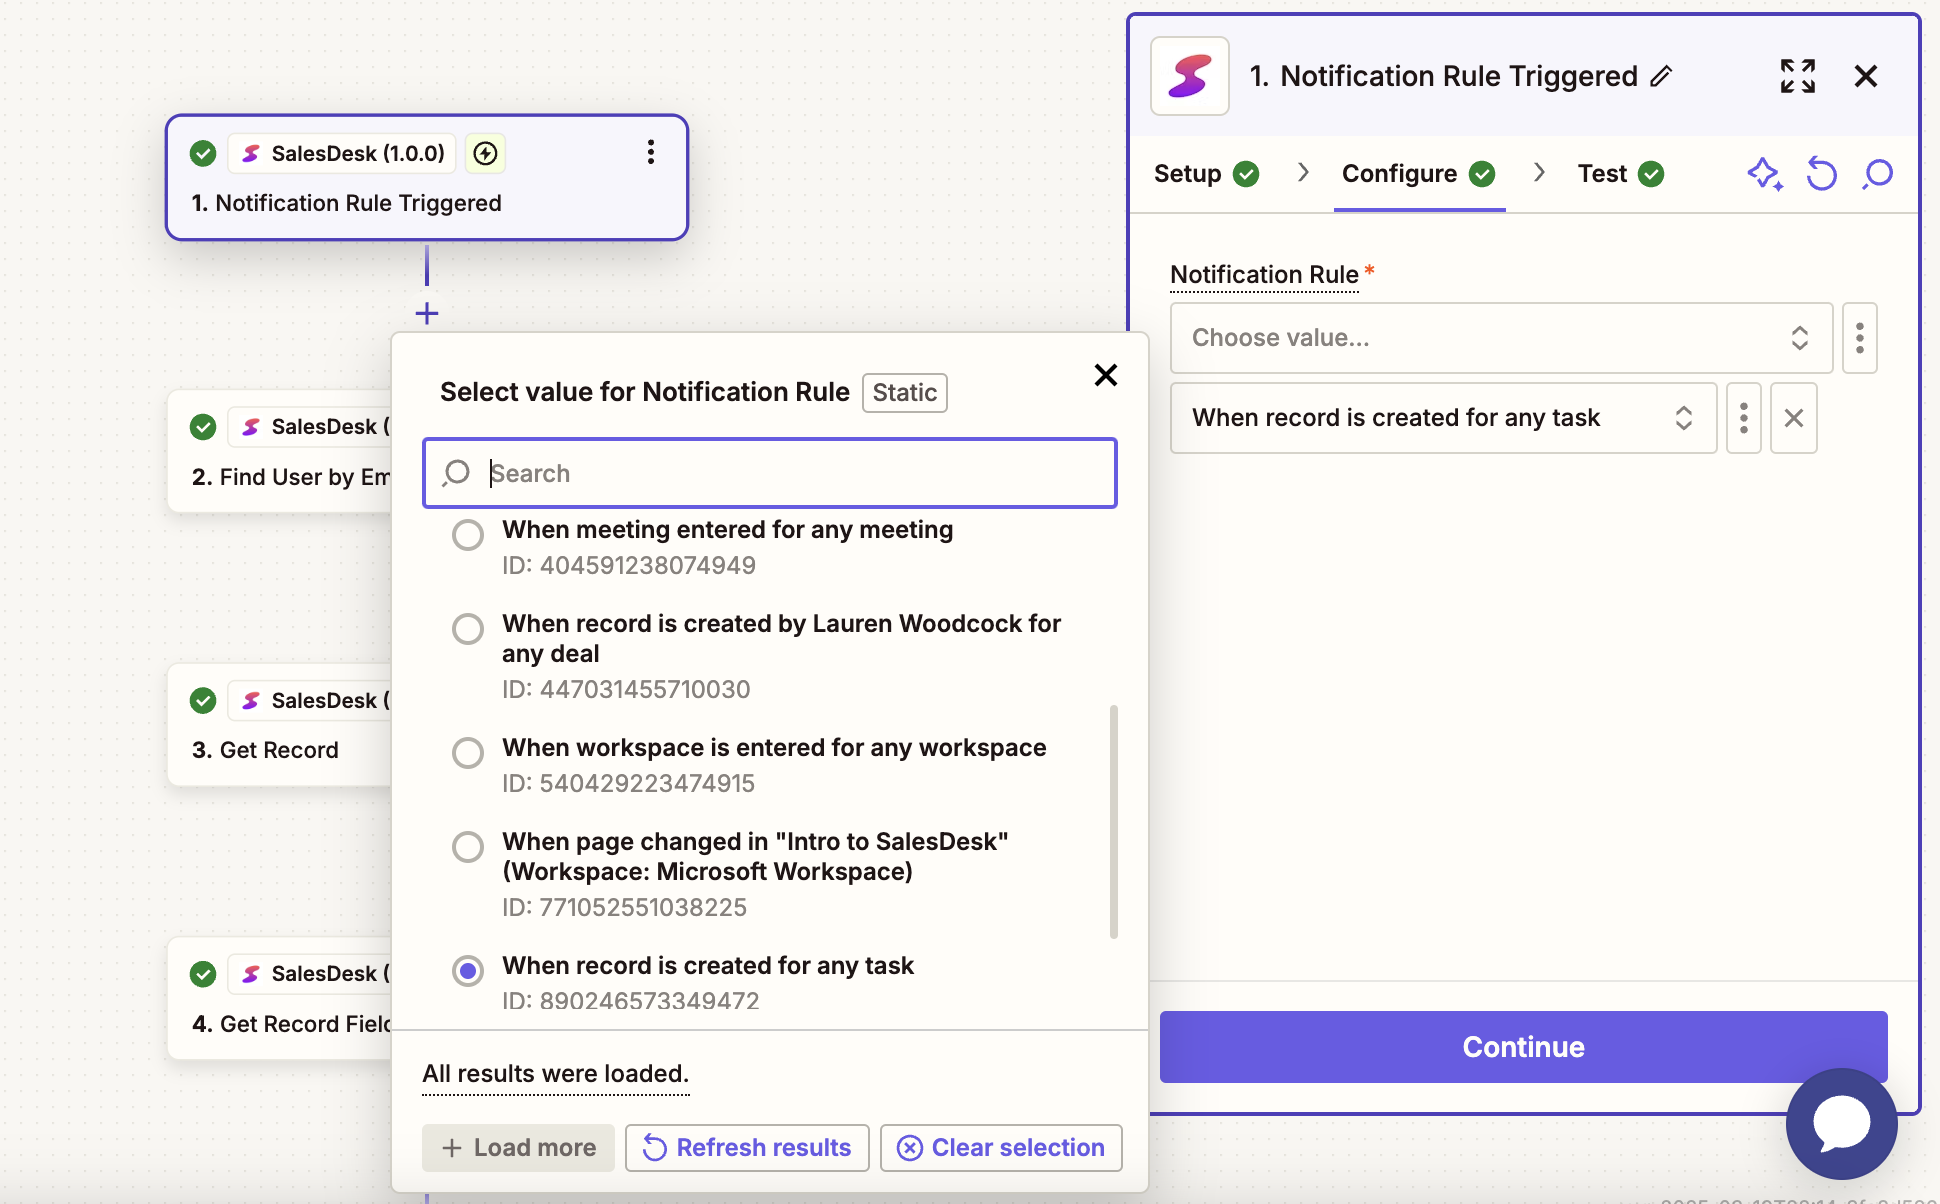
4
Test Trigger
Once you have set up the trigger, you can test it to ensure that the correct event data from SalesDesk is being delivered to it.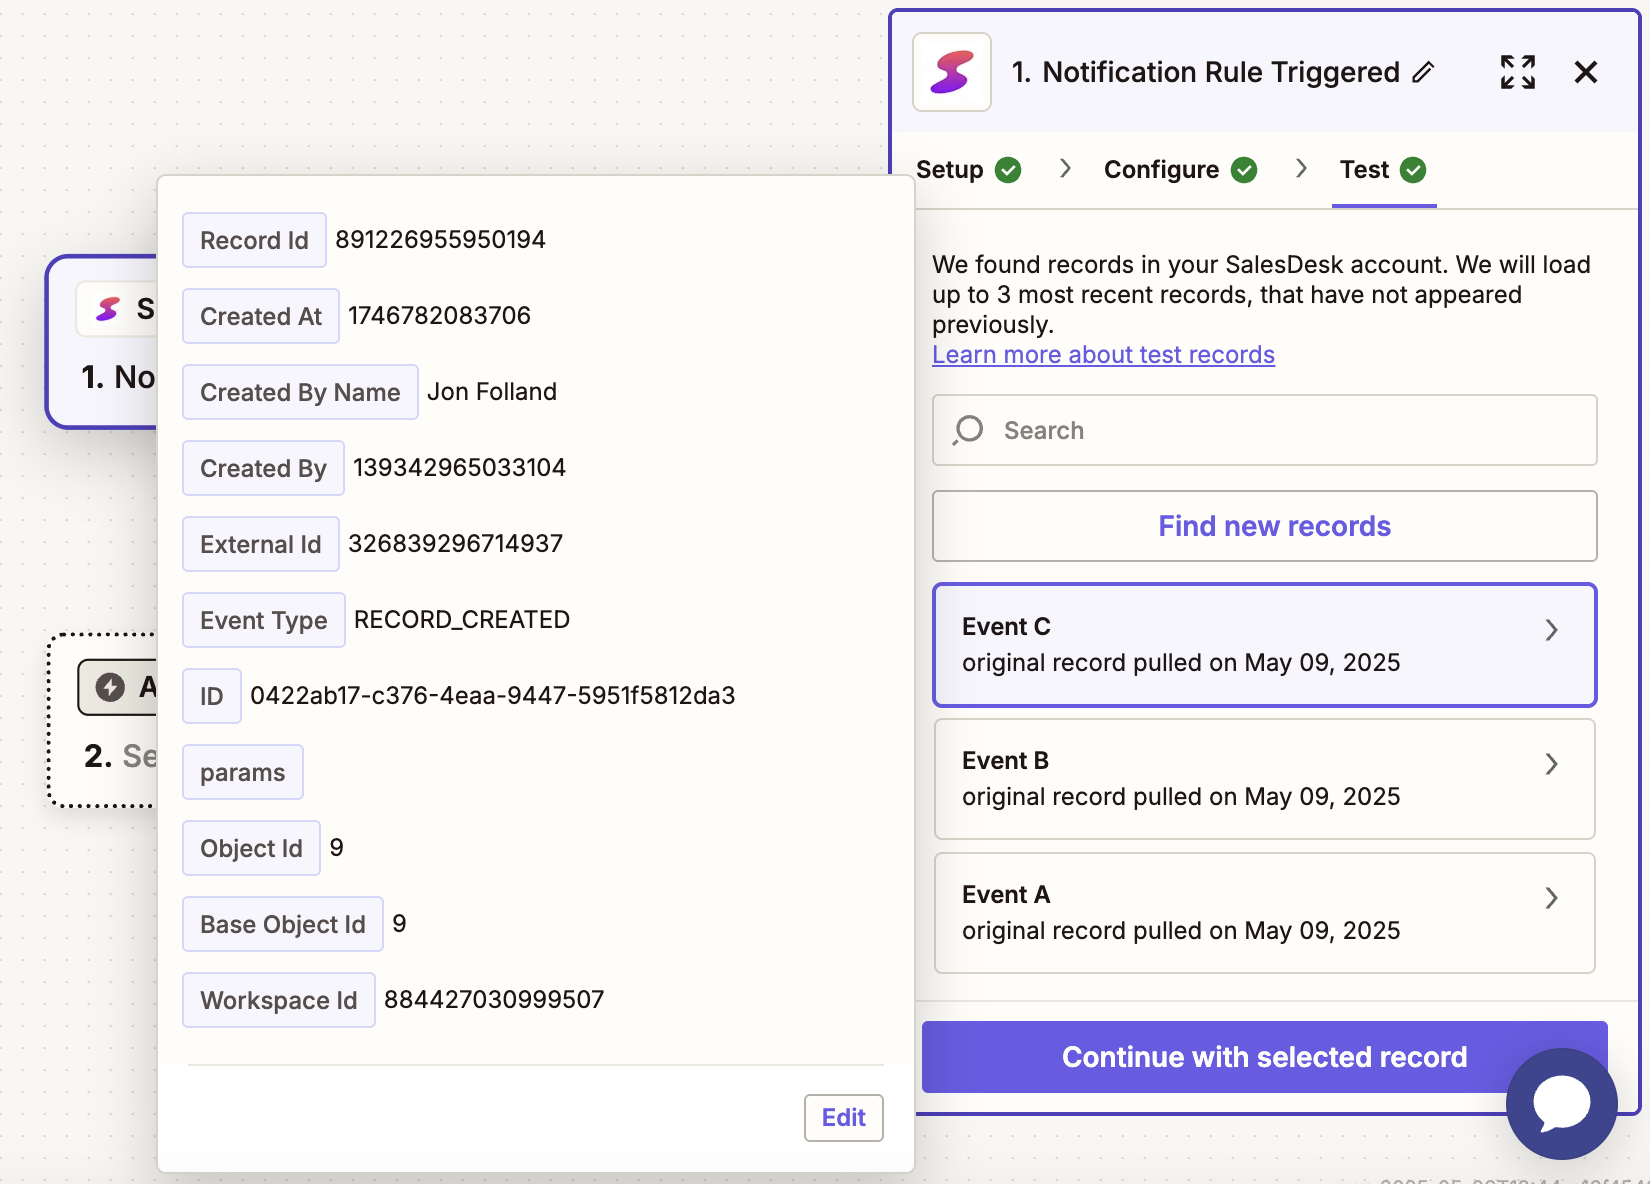
Notification Rule Data
The data sourced from the SalesDesk Zapier app trigger is a SalesDesk event object. The structure of the object is as follows.- recordId: ID of the SalesDesk record that generated this event.
- createdAt: The time this event was generated (milliseconds since the epoch).
- createdByName: Name of the SalesDesk user that created the event.
- externalId: ID of the event object.
- eventType: Type of SalesDesk event.
- workspaceId: The ID of the workspace from which this event was generated.
- id: Internal SalesDesk event ID.
- params: Key-value pair object of relevant data for the particular event.
- objectId: Id of the object type to which the record belongs.
- baseObjectId: Super-type of the object type to which the record belongs.